Showing posts with label DIY. Show all posts

Tuesday, May 10, 2011

DIY - Bright White Onsies

If you're expecting your second (plus) baby and you've been pulling out those old onsies, here is a remedy for getting out all those yellow spit up stains. Supermom really is super.

First, she divided the clothes into two loads by size; one load for 0-3 months items and another for 3-6 months.
- Put the the first load into the washer with two scoops of Oxi Clean (she buys the big tub from Costco) and a small amount of laundry detergent. She lets the agitator run for about 5 minutes and then let the load soak overnight.
- In the morning she poured white vinegar into the fabric softener compartment on my machine. Vinegar is helpful during the rinse/spin cycle to break down excess detergent that might “stick” and create residue on the clothes. If your washer doesn’t have a fabric softener compartment you can get a fabric softener ball to throw into your wash — it automatically dispenses at the right time. Since these clothes will be going next to sensitive baby skin, she also sets her washer for a second rinse cycle to make sure everything rinsed out nice and clean.
- Once the washer was done, she transferred the clothes to the dryer but as she did so she checked each piece to make sure the yellow spots were gone. The soak and wash worked really well but there were a few pieces that still had spots. She kept those items out of the dryer (for fear of setting the stains), and applied spot stain removers and then rewashed. She also let these items hang out on the clothes line as the sun is supposed to help fade the spots.
- Repeat the above process with your second, 3-6 months load.
Now most of the stored baby clothes should be ready for new baby to wear, and whatever didn’t come clean enough can be added to the toss/donate piles.

Wednesday, April 20, 2011

DIY - Vibrant Easter Eggs


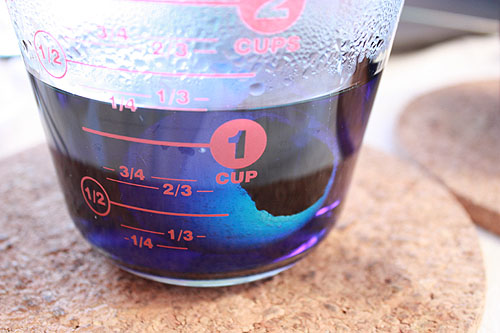
I finally found a tutorial on how to dye your Easter eggs so they are vibrant in color. Mine always turn out pastel -ish and I'm super excited to try this one. Megan actually puts a little surprise in hers and it is so cute. Check it out here. 


I simply follow her instructions for dyeing the eggs and skip all the rest. They are as follows:


These instructions are for the familiar McCormick food coloring you can find in any grocery store, one box of regular colors and one box of neon colors. Each below will cover one egg at a time, you can either double the ingredients or let a second egg soak just a bit longer.

For each of these I used:
  • 2 Tablespoons white vinegar
  • 1 cup just-boiled water
  • 10 minutes of soaking, turning the egg over half way through (15 minutes where noted)
red
  • 10 drops neon pink
  • 1 drop neon purple
  • 2 drops red
orange
  • 20 drops yellow
  • 5 drops red
  • soak for 15 minutes
yellow
  • 15 drops yellow
  • 2 drops neon green
  • soak for 15 minutes
green
  • 20 drops neon green
  • 2 drops neon blue
  • 1 drop green
  • soak for 15 minutes
blue
  • 6 drops neon blue
  • 1 drop blue
purple
  • 7 drops neon blue
  • 5 drops neon pink
magenta
  • 10 drops neon pink
  • 2 drops neon purple
If you’d like to make your own colors know that I found starting with neon colors and adding regular colors to tone those down worked the best in most cases for me.

Have fun friends!

Thursday, March 10, 2011

DIY - Carseat Canopy

I loved having a car seat canopy when my little guy was a baby. It kept out light, germs, and strangers. So nice! I've even seen some people double it up as a hooter hider. Looking for cute fabric? I shop for mine here and here 

I found this easy tutorial on Christy's cute little site. Check out her baby skirt tutorial too! 


Tuesday, February 22, 2011

DIY - Baby food

I am a firm believer that you don't have to sacrifice flavor when eating healthy.

Now, I also know that our little ones have to be introduced to flavor slowly.

Very little salt. Not too sweet. No nuts. No dairy. And all that makes sense! You don’t want to go ruining their virgin taste buds or anything, but it still seems like your first introduction to food should be a good one.

Have you ever opened a can of store bought green beans? They wreak. No wonder our little ones make those faces.

Another problem with store bought baby food is it doesn't even taste like the real deal.

After I started making my own baby food I felt so much more comfortable knowing exactly what my kiddo was eating - he liked it more too. I like to think that the reason he loves peas and carrots now are because he was getting what he eats now in the beginning.

Here were our favorites:

Peas and Zucchini
Baked Apple and Carrots with cinnamon
Baked Apple and Sweet Potatoes with cinnamon
Potatos with a few herbs
Avocado
Bananas with a drop of OJ

Now, when I first started my little guy on solids I thought, how in the world do moms have TIME to make baby food?

Let me just tell you...it probably takes more effort going to the grocery store to buy food than it does to make it. You can probably make 1 month worth of baby food in two hours.

There are so, so many ways to make your own baby food, but this is how I've done it.

1. Clean Veggies/Fruit thoroughly.
2. Cook  - I saute the zucchini, boil the potatoes/peas/beans, and bake the apples. This is when I add the herbs or cinnamon. One trick I learned was to cook the veggies with homemade broth. {Recipe here}This made a HUGE difference (in my opinion).
3. Puree in a blender untill smooth

That's it. You're done.

I stored my baby food in recycled jars and ice trays.

I got all my recipes from my sisters and this site here
I did a little research on these sites here, here, here and here
photo from here

Good luck friends! Let me know if you have any questions....not like I'm a pro or anything...but you know, about how I did it.

Thursday, February 10, 2011

DIY - Party Hats

So quick and easy and adds a lot of fun to your sweet little one's birthday bash!

Materials needed: 
12 X 12 scrapbook paper – 1 sheet per hat 
1 cone hat for reference
 
1 roll crepe paper
 
Double-sided tape

Elastic cord

Tools needed:
 
Pencil
 Scissors 
Sewing machine


Steps:
 
Trace outline of premade hat scrapbook hat and cut out.
 
Apply double sided tape to one short edge of the hat and fold to create cone.
 
Cut strip of elastic cord for chin strap and tape on the inside of the hat.
 
To create fringe: cut 3 -15” strips of crepe paper.
Layer them and sew a seam down the middle.
 
Fold crepe paper in half and cut to create fringe – being careful to not cut the seam.
 
Apply double sided tape to the bottom of the hat and attach fringe.
 
Apply hat to child and voila, it party time!


{tutorial by Michele Wimborough of Cakewalk Baking}
{photography by sherry heck}